Setup
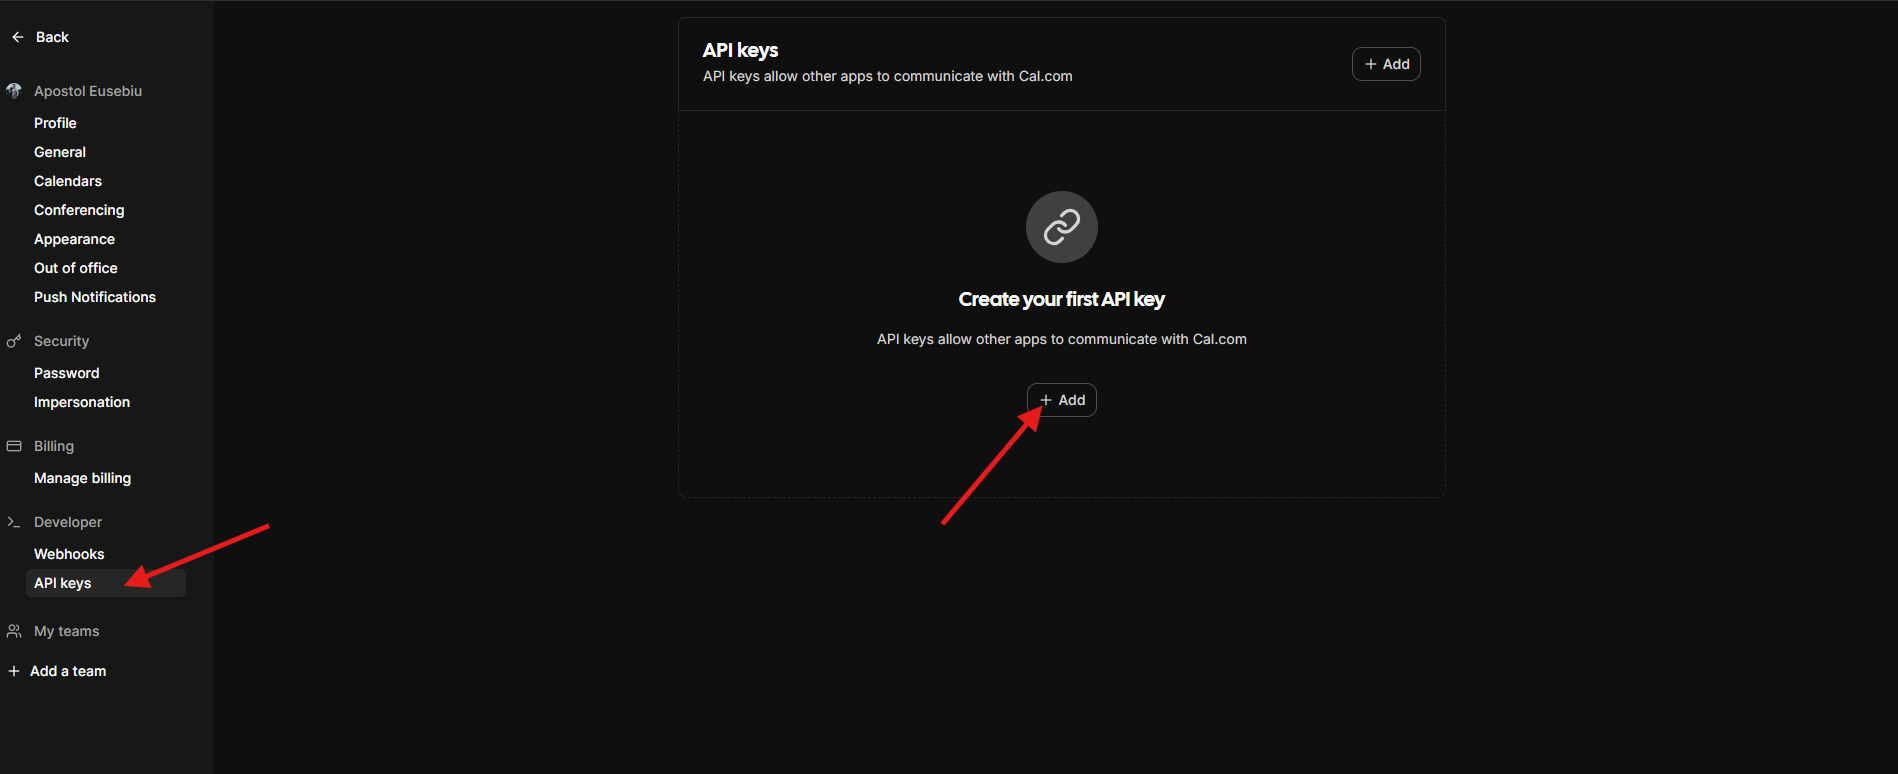
1. Get API Key
- Log in to Cal.com
- Go to Settings → Developer → API Keys
- Create a new API key and copy it
2. Connect Cal.com
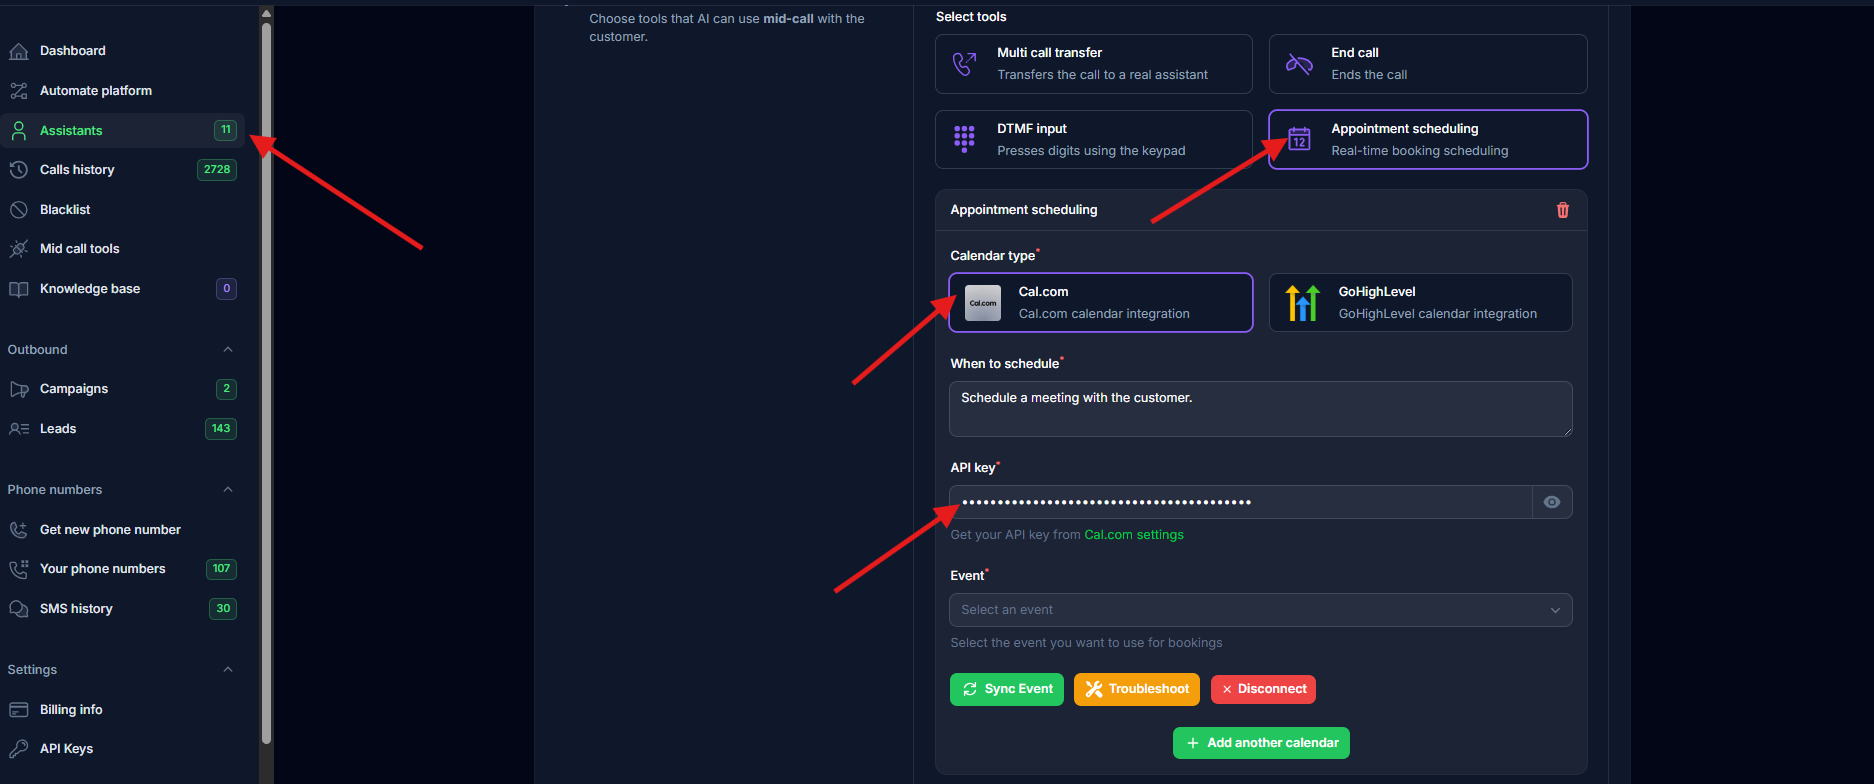
- In your assistant settings → Tools tab → Appointment Scheduling
- Select Cal.com from calendar type
- Paste your API key
- Select an event from the dropdown
3. Sync Event
Click the “Sync Event” button to automatically configure booking fields.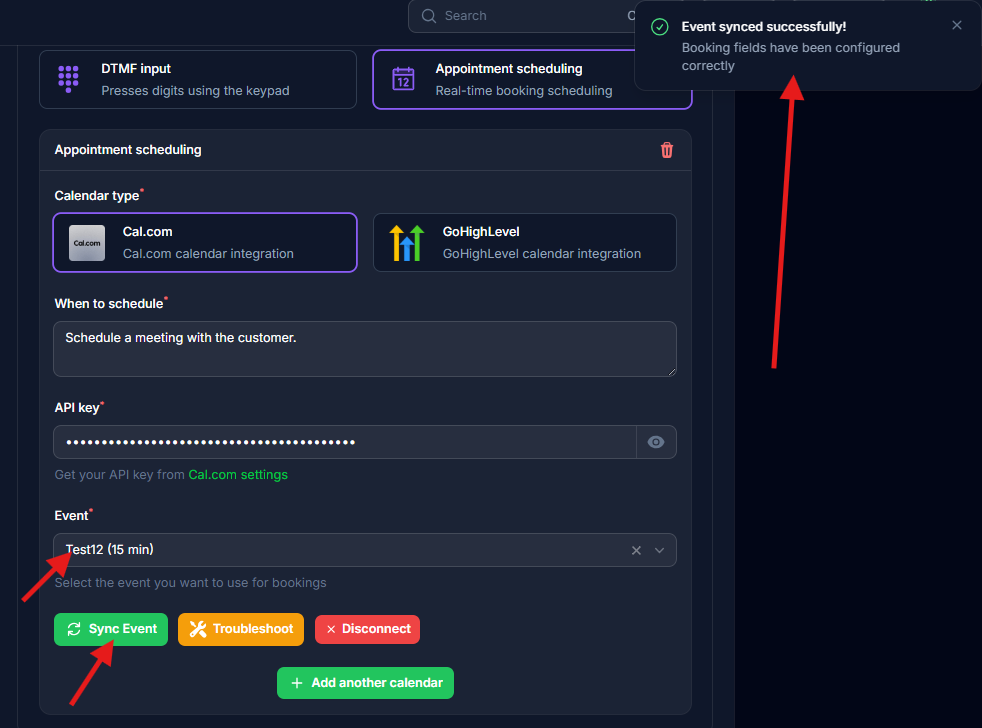
The sync configures: name, email, phone (required) + notes (optional). All other fields become optional.
Multiple Calendars
Click ”+” next to Appointment Scheduling to add more calendars (e.g., 15min, 30min meetings).Email Setup
For calendar invites to work:- Define
emailin assistant input variables - Pass customer email when creating leads
Troubleshooting
Invalid API Key: Verify it’s active in Cal.com settings and includescal_live_ prefix
Sync Failed: Click “Troubleshoot” button to reset fields
No Invites Sent: Ensure email variable is defined and passed with leads
Field Errors: Use “Troubleshoot” to reset. Only name, email, phone should be required.
For detailed troubleshooting, see Cal.com Issues.
Testing
- Make a test call and request a meeting
- Verify booking appears in Cal.com
- Check calendar invitation email was received